Smartphone cameras have evolved dramatically, boasting impressive specs and features. Yet, blurry photos remain a common problem. Understanding the root causes can transform your photography experience. In this article, we’ll explore the reasons behind blurry photos and share tips to enhance your smartphone photography skills. Whether you’re documenting a family gathering or capturing scenic views, clearer photos are within reach. So, let’s delve into the factors that might be sabotaging your photos and how to overcome them.
Common Factors Affecting Photo Quality
Blurriness in smartphone photos can arise from numerous sources. Every factor can be addressed once identified, leading to crisper, clearer images on your device.
Physical Factors
One of the primary culprits behind blurry smartphone photos is physical movement. Even the slightest shake during the capture can cause significant blurriness. This tremor is exaggerated when taking photos in low-light conditions, where the camera uses a slower shutter speed. Another physical factor is the condition of the camera lens. Over time, lenses accumulate fingerprints, dust, and smudges that degrade image quality. Cleaning the lens regularly ensures clearer pictures. Additionally, the use of zoom, especially digital zoom, can introduce blurriness. Unlike optical zoom, digital zoom enlarges the pixels in an image, causing a loss of detail and sharpness. Avoid zooming whenever possible to maintain clarity.
Software Issues
Software glitches can also impact photo clarity. With frequent updates, sometimes bugs result in malfunctioning camera apps, leading to subpar image quality. An outdated operating system or app can lead to lag, misalignment, or incorrect processing of images, making them blurry. Ensuring your smartphone’s OS and apps are updated helps mitigate these issues. Moreover, background apps hogging CPU resources can slow down camera operations, resulting in blurriness. Closing unnecessary apps ensures the camera functions optimally. Lastly, camera features driven by AI or machine learning sometimes misjudge scenes, causing incorrect focus or exposure settings. Adjust manually if photos aren’t coming out as expected.
Phone Settings Issues
Incorrect phone settings often lead to blurry images. The most common is autofocus failures. If autofocusing isn’t precise, your subject may appear blurred. Switching to manual focus can rectify this. Exposure settings also play a significant role. Automatic exposure doesn’t always suit every environment, especially in variable lighting. Adjusting exposure manually improves clarity. Another setting is the image stabilization feature; if turned off, the slightest hand movement can impact sharpness. Keeping it enabled assists in maintaining focus. Lastly, the resolution settings matter. Lower resolution settings capture less detail, leading to a less sharp image. Always ensure the highest resolution setting is chosen for detailed pictures.
See also: Sustainability Consulting in Australia Needs a Compliance Register Makeover
Pro Tips to Take Sharper Photos
Mastering some practical tips can help you easily take clearer and more detailed photos.
Use Both Hands and Stabilize Your Phone
Stability is paramount for clear photos. Holding your smartphone with both hands can significantly reduce the shakiness common with single-handed operation. By spreading your arms slightly and tucking your elbows into your sides, you create a more reliable structure for your phone. For additional stability, lean against a solid surface, like a wall or table. Smartphone cameras have tiny sensors; even minor movements can cause blurring, especially in low-light scenarios where shutter speeds are slower. Remember, a stable grip can make the difference between a clear and a blurry shot. Using additional accessories like a stabilizer or grip can also help minimize hand movement during the shot.
Tap to Focus and Adjust Exposure Manually
Smartphones often excel at determining the focus and exposure automatically, but relying solely on these can lead to less than optimal results. By tapping your phone’s screen where you want to focus, you instruct your camera to fine-tune its focal point for that specific spot. This is invaluable for capturing a sharp subject with a blurred background (bokeh effect). Moreover, adjusting the exposure manually gives you control over the brightness of your image, especially in mixed-light conditions where auto settings may falter. Many phone cameras offer this feature in settings—explore your options to enhance image quality. Practice by alternating between auto and manual modes to see what works best.
Clean the Lens Regularly
Your smartphone lens is constantly exposed to the elements, collecting dust, fingerprints, and smudges that degrade photo quality. Regular cleaning can prevent this. Use a soft microfiber cloth, the same kind you’d use for eyeglasses. Gently wipe the lens in a circular motion to remove debris without scratching the surface. Avoid using tissues or rough materials that might leave particles or scratch the lens. For stubborn grime, lightly dampen your cloth with distilled water or lens cleaner. Incorporate lens cleaning into your weekly routine, especially if you store your phone in your pocket or bag frequently. A clean lens ensures that your camera captures images as intended, free from unwanted haze or distortion.
Use a Tripod or Built-in Stabilization
For times when hand-holding isn’t providing the desired sharpness, consider using a tripod. A tripod offers unparalleled stability, making it ideal for low-light photos, long exposures, and any situation requiring precision. They’re available in various sizes, from pocket versions to full-sized ones, suitable for different shooting environments. Additionally, modern smartphones often come equipped with built-in stabilization features, like optical image stabilization (OIS) or electronic image stabilization (EIS). These technologies help counteract hand movement and stabilize the image for a clearer photo. Explore these settings in your camera app to see which mode works best for your needs.
When to Consider Upgrading Your Smartphone Camera
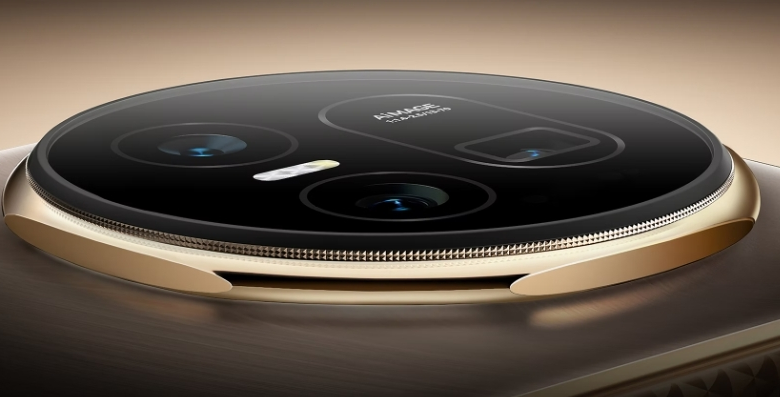
If you’ve tried all the pro tips and still face issues with blurry photos, it might be time to consider an upgrade. Smartphone technology advances rapidly, and newer models boast significant enhancements in camera capabilities. If your current device is multiple generations old, it may lack modern features like advanced stabilization, low-light performance, or high-megapixel sensors, impacting image quality. Research the latest models, focusing on camera reviews, specs, and user feedback. If photography is a core reason for using your smartphone, investing in a model with superior camera capabilities can significantly enhance your photographic experience, leading to consistently sharper, clearer images.
Conclusion
Blurry smartphone photos, though frustrating, are rarely unsolvable. By understanding the physical, software, and settings issues, you can address and prevent many common causes of blur. Simple techniques like stabilizing your grip, adjusting focus and exposure, and keeping the lens clean go a long way. If needed, upgrading your device can bring advanced camera technologies right into your hands. The HONOR Magic V5 may be your ideal choice. With the above insights and tips, sharper, professional-looking photos are achievable. Empower yourself with knowledge, and you’ll soon master capturing breathtaking images with your smartphone.Meta Title: Why Are My Smartphone Photos Blurry?
Meta Description: Discover the real reasons why your smartphone photos look blurry—and follow proven tips to fix and prevent blurry images for good.
Why Do My Smartphone Photos Look Blurry?
Smartphone cameras have evolved dramatically, boasting impressive specs and features. Yet, blurry photos remain a common problem. Understanding the root causes can transform your photography experience. In this article, we’ll explore the reasons behind blurry photos and share tips to enhance your smartphone photography skills. Whether you’re documenting a family gathering or capturing scenic views, clearer photos are within reach. So, let’s delve into the factors that might be sabotaging your photos and how to overcome them.
Common Factors Affecting Photo Quality
Blurriness in smartphone photos can arise from numerous sources. Every factor can be addressed once identified, leading to crisper, clearer images on your device.
Physical Factors
One of the primary culprits behind blurry smartphone photos is physical movement. Even the slightest shake during the capture can cause significant blurriness. This tremor is exaggerated when taking photos in low-light conditions, where the camera uses a slower shutter speed. Another physical factor is the condition of the camera lens. Over time, lenses accumulate fingerprints, dust, and smudges that degrade image quality. Cleaning the lens regularly ensures clearer pictures. Additionally, the use of zoom, especially digital zoom, can introduce blurriness. Unlike optical zoom, digital zoom enlarges the pixels in an image, causing a loss of detail and sharpness. Avoid zooming whenever possible to maintain clarity.
Software Issues
Software glitches can also impact photo clarity. With frequent updates, sometimes bugs result in malfunctioning camera apps, leading to subpar image quality. An outdated operating system or app can lead to lag, misalignment, or incorrect processing of images, making them blurry. Ensuring your smartphone’s OS and apps are updated helps mitigate these issues. Moreover, background apps hogging CPU resources can slow down camera operations, resulting in blurriness. Closing unnecessary apps ensures the camera functions optimally. Lastly, camera features driven by AI or machine learning sometimes misjudge scenes, causing incorrect focus or exposure settings. Adjust manually if photos aren’t coming out as expected.
Phone Settings Issues
Incorrect phone settings often lead to blurry images. The most common is autofocus failures. If autofocusing isn’t precise, your subject may appear blurred. Switching to manual focus can rectify this. Exposure settings also play a significant role. Automatic exposure doesn’t always suit every environment, especially in variable lighting. Adjusting exposure manually improves clarity. Another setting is the image stabilization feature; if turned off, the slightest hand movement can impact sharpness. Keeping it enabled assists in maintaining focus. Lastly, the resolution settings matter. Lower resolution settings capture less detail, leading to a less sharp image. Always ensure the highest resolution setting is chosen for detailed pictures.
Pro Tips to Take Sharper Photos
Mastering some practical tips can help you easily take clearer and more detailed photos.
Use Both Hands and Stabilize Your Phone
Stability is paramount for clear photos. Holding your smartphone with both hands can significantly reduce the shakiness common with single-handed operation. By spreading your arms slightly and tucking your elbows into your sides, you create a more reliable structure for your phone. For additional stability, lean against a solid surface, like a wall or table. Smartphone cameras have tiny sensors; even minor movements can cause blurring, especially in low-light scenarios where shutter speeds are slower. Remember, a stable grip can make the difference between a clear and a blurry shot. Using additional accessories like a stabilizer or grip can also help minimize hand movement during the shot.
Tap to Focus and Adjust Exposure Manually
Smartphones often excel at determining the focus and exposure automatically, but relying solely on these can lead to less than optimal results. By tapping your phone’s screen where you want to focus, you instruct your camera to fine-tune its focal point for that specific spot. This is invaluable for capturing a sharp subject with a blurred background (bokeh effect). Moreover, adjusting the exposure manually gives you control over the brightness of your image, especially in mixed-light conditions where auto settings may falter. Many phone cameras offer this feature in settings—explore your options to enhance image quality. Practice by alternating between auto and manual modes to see what works best.
Clean the Lens Regularly
Your smartphone lens is constantly exposed to the elements, collecting dust, fingerprints, and smudges that degrade photo quality. Regular cleaning can prevent this. Use a soft microfiber cloth, the same kind you’d use for eyeglasses. Gently wipe the lens in a circular motion to remove debris without scratching the surface. Avoid using tissues or rough materials that might leave particles or scratch the lens. For stubborn grime, lightly dampen your cloth with distilled water or lens cleaner. Incorporate lens cleaning into your weekly routine, especially if you store your phone in your pocket or bag frequently. A clean lens ensures that your camera captures images as intended, free from unwanted haze or distortion.
Use a Tripod or Built-in Stabilization
For times when hand-holding isn’t providing the desired sharpness, consider using a tripod. A tripod offers unparalleled stability, making it ideal for low-light photos, long exposures, and any situation requiring precision. They’re available in various sizes, from pocket versions to full-sized ones, suitable for different shooting environments. Additionally, modern smartphones often come equipped with built-in stabilization features, like optical image stabilization (OIS) or electronic image stabilization (EIS). These technologies help counteract hand movement and stabilize the image for a clearer photo. Explore these settings in your camera app to see which mode works best for your needs.
When to Consider Upgrading Your Smartphone Camera
If you’ve tried all the pro tips and still face issues with blurry photos, it might be time to consider an upgrade. Smartphone technology advances rapidly, and newer models boast significant enhancements in camera capabilities. If your current device is multiple generations old, it may lack modern features like advanced stabilization, low-light performance, or high-megapixel sensors, impacting image quality. Research the latest models, focusing on camera reviews, specs, and user feedback. If photography is a core reason for using your smartphone, investing in a model with superior camera capabilities can significantly enhance your photographic experience, leading to consistently sharper, clearer images.
Conclusion
Blurry smartphone photos, though frustrating, are rarely unsolvable. By understanding the physical, software, and settings issues, you can address and prevent many common causes of blur. Simple techniques like stabilizing your grip, adjusting focus and exposure, and keeping the lens clean go a long way. If needed, upgrading your device can bring advanced camera technologies right into your hands. The HONOR Magic V5 may be your ideal choice. With the above insights and tips, sharper, professional-looking photos are achievable. Empower yourself with knowledge, and you’ll soon master capturing breathtaking images with your smartphone.